Chatbox Configuration
Chatbox is a cross-platform AI desktop client (supports Windows, macOS, Linux, iOS, Android) with a clean interface and support for multiple AI service providers.
Prerequisites
- A registered HaoAI account with an API Key (Get one here )
- Chatbox installed (Download )
Configuration Steps
Step 1: Open Settings
Launch Chatbox and click Settings in the bottom-left corner.

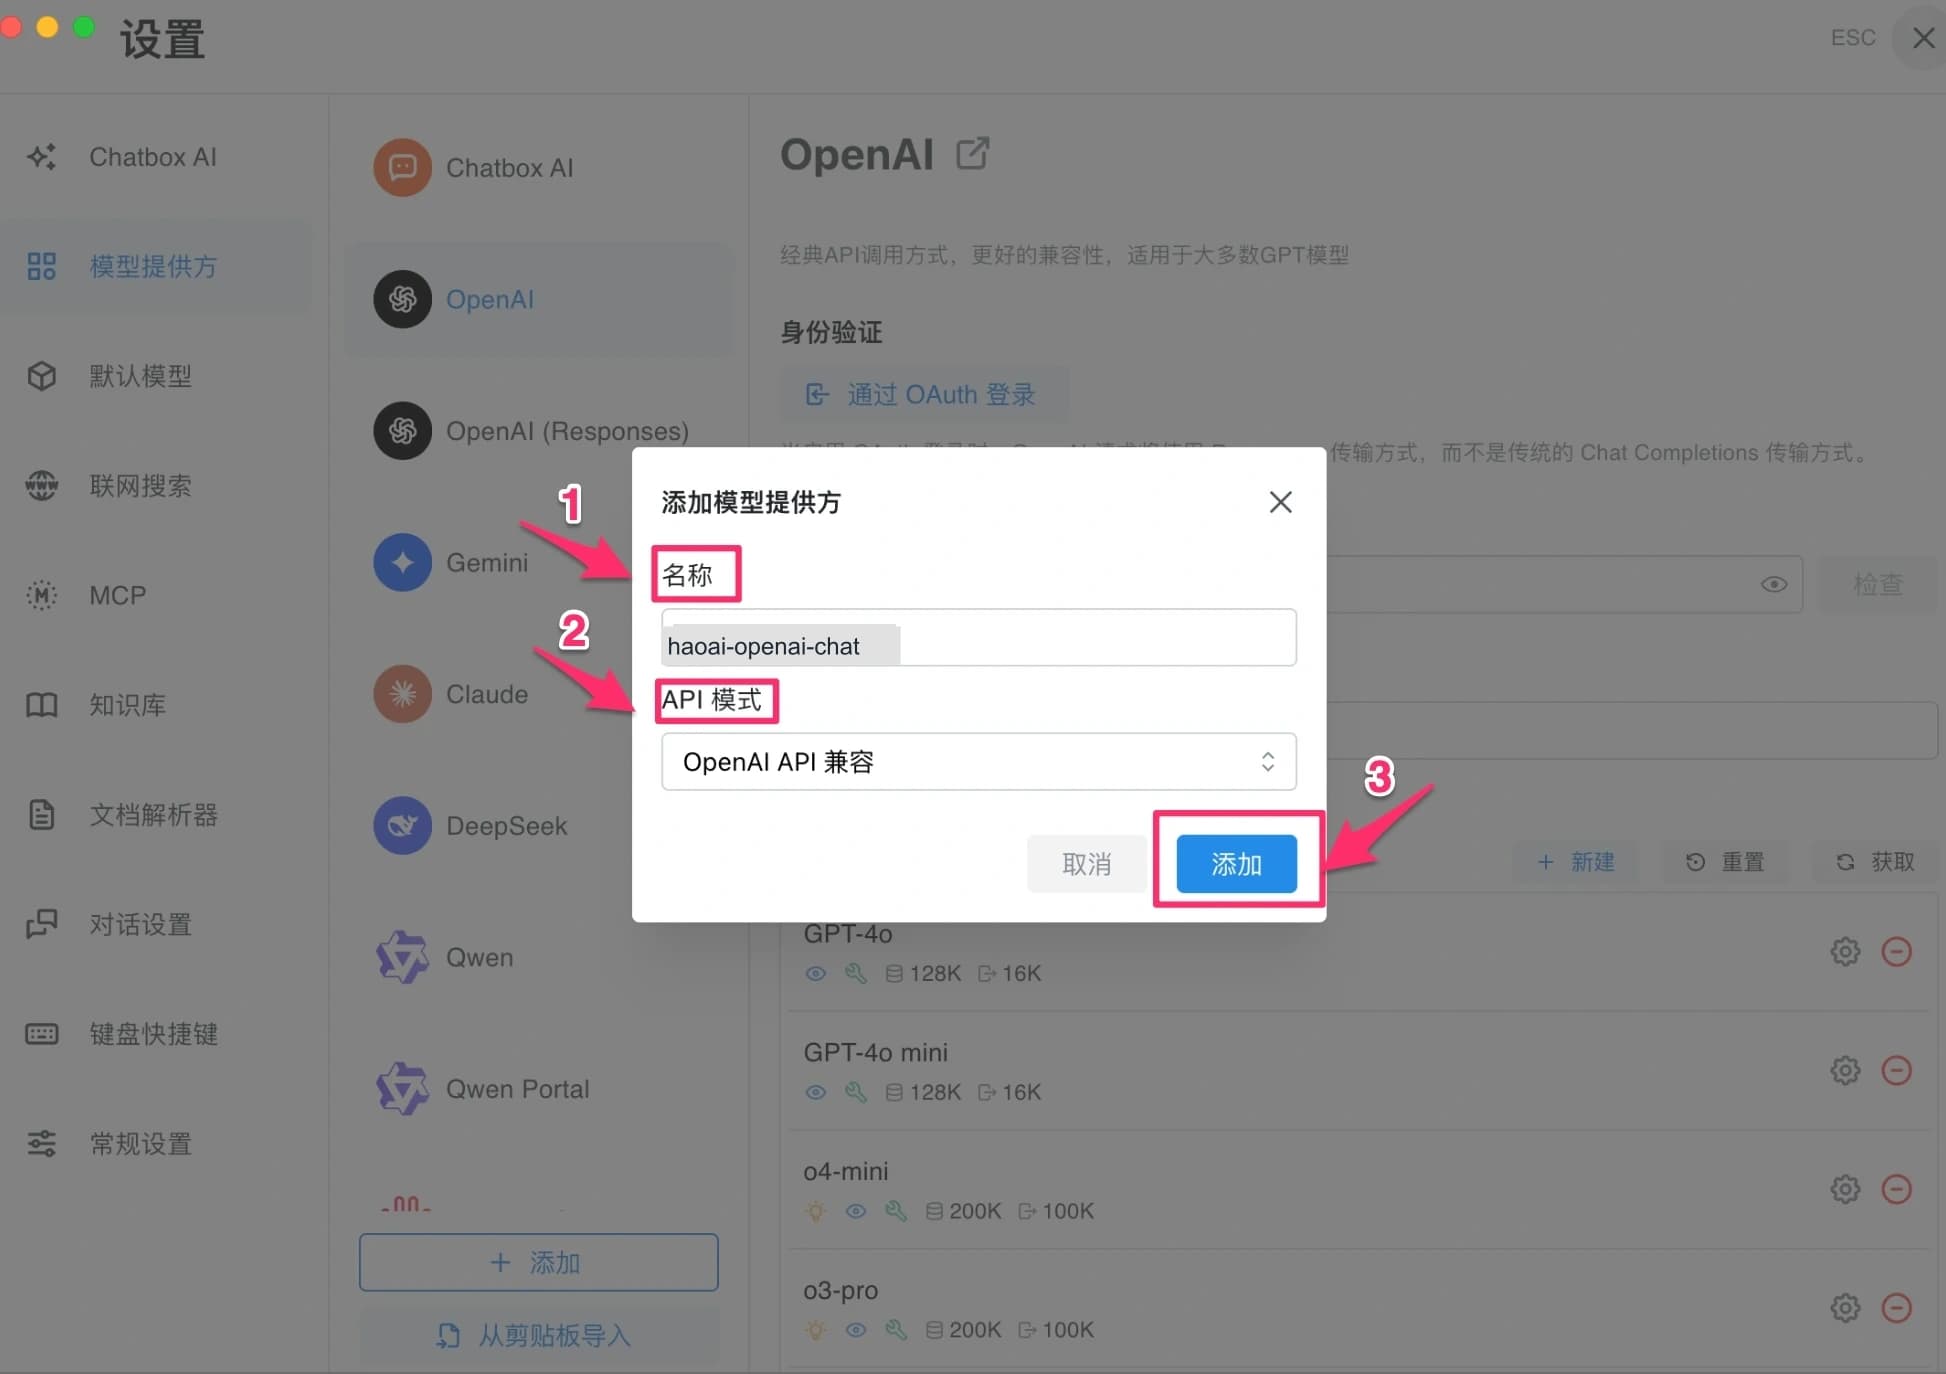
Step 2: Go to Model Providers and click + Add
Click Model Providers on the left, then click the + Add button at the bottom.

Step 3: Select API Mode
In the dialog that appears, enter a name and select the corresponding API Mode. HaoAI supports the following four:
| API Mode | API Host | Example Models |
|---|---|---|
| OpenAI API Compatible | https://api.hao.ai/v1 | openai/gpt-4.1, openai/gpt-5.3-chat |
| OpenAI Responses API Compatible | https://api.hao.ai/v1 | openai/gpt-4.1, openai/gpt-5.3-chat |
| Anthropic Claude API Compatible | https://api.hao.ai/anthropic/v1 | anthropic/claude-sonnet-4.6, anthropic/claude-opus-4.6 |
| Google Gemini API Compatible | https://api.hao.ai/gemini | gemini-2.5-flash, gemini-3.1-pro-preview |
Click Add when done.
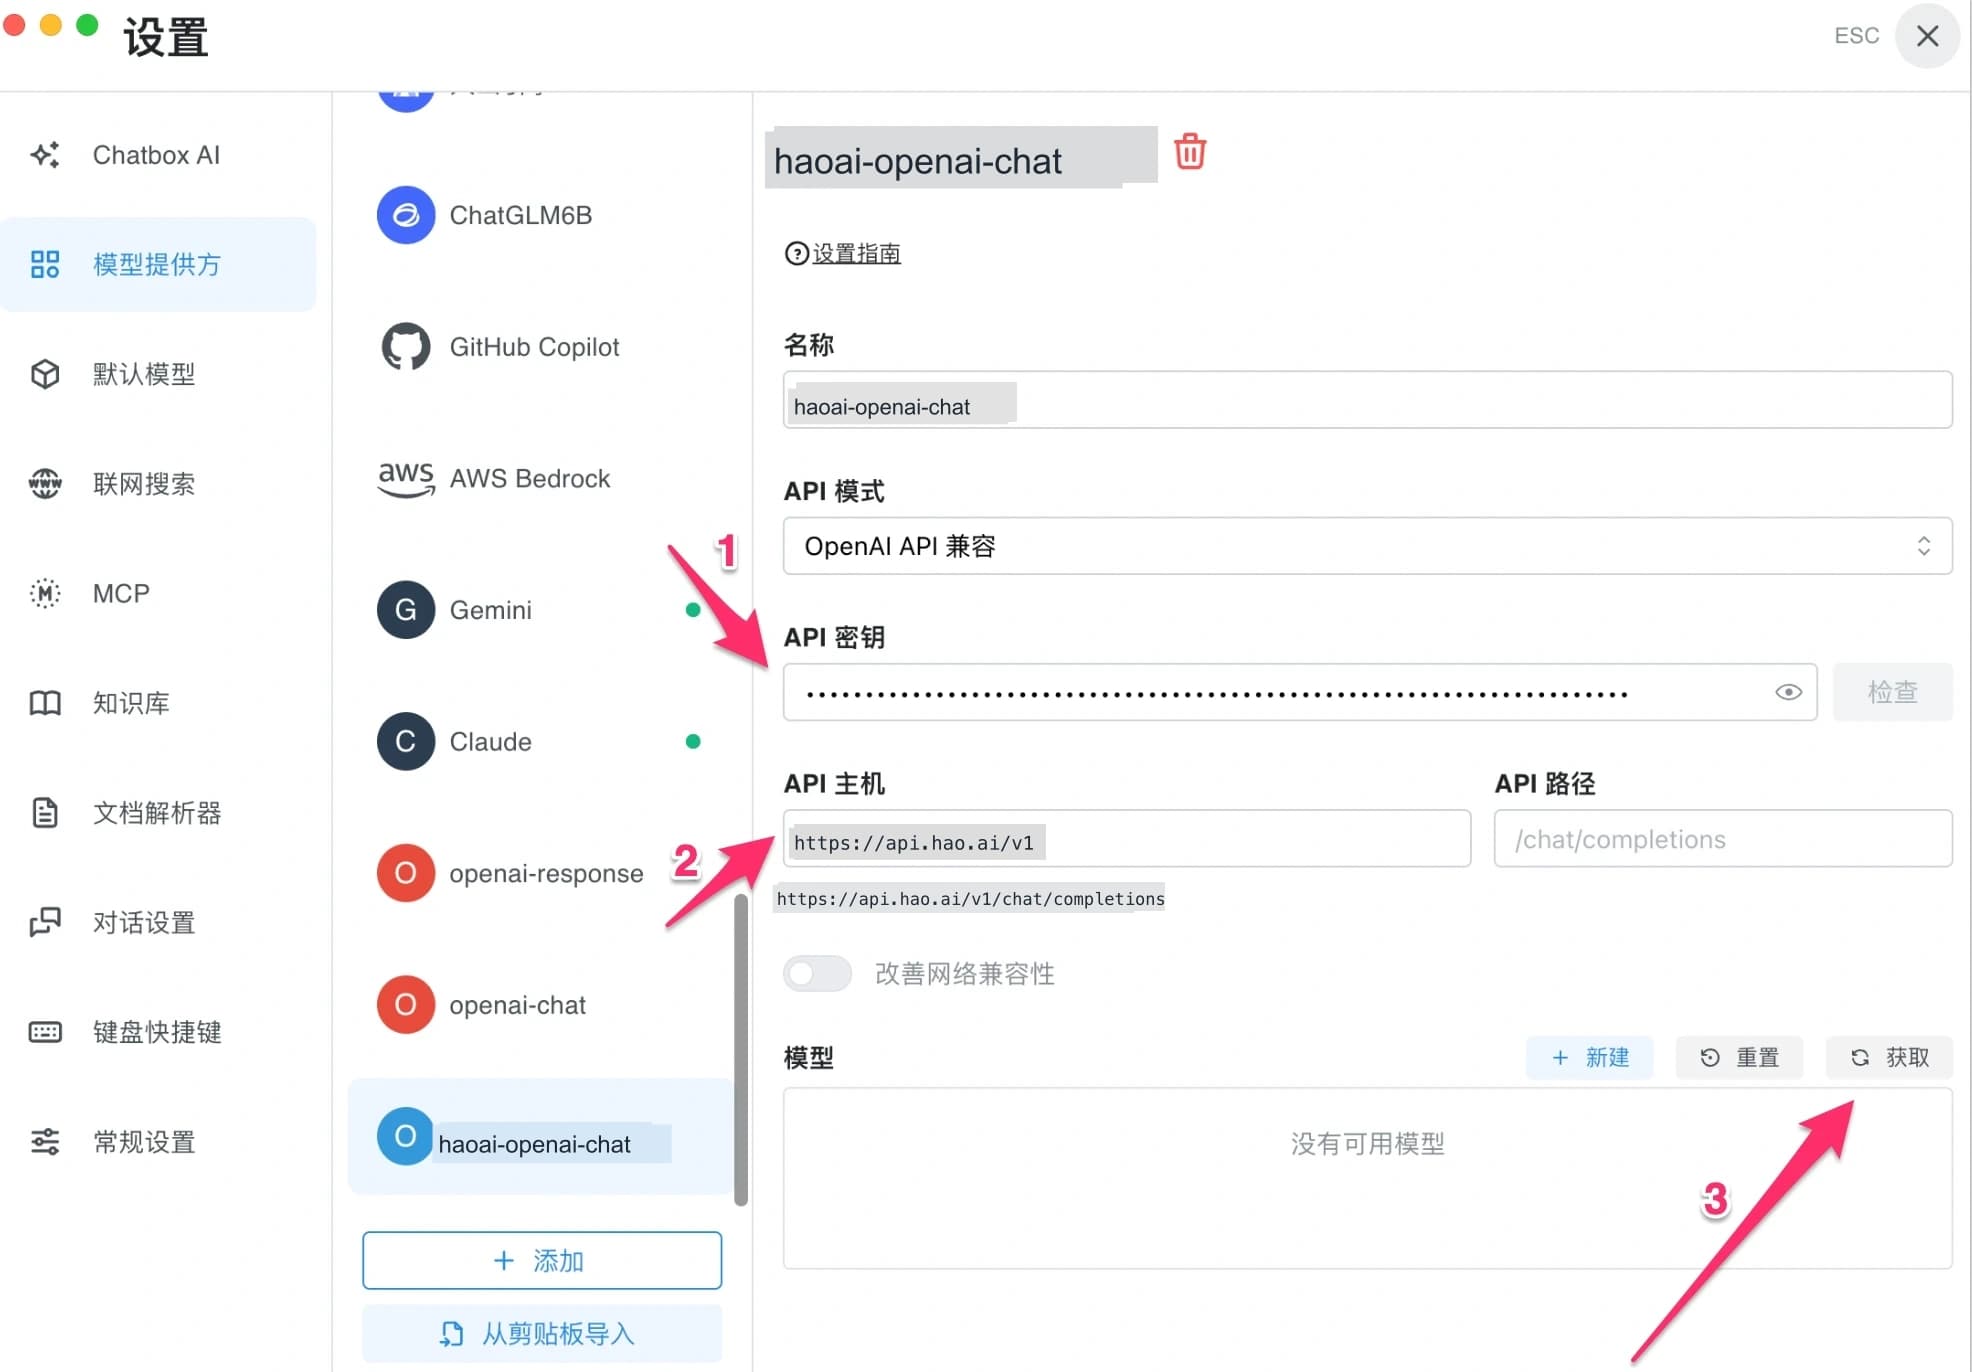
Step 4: Fill in Configuration Details
On the configuration page, enter your API Key and API Host, then click Fetch to automatically retrieve the model list.
| Field | Value |
|---|---|
| API Key | Your HaoAI API Key |
| API Host | The address corresponding to the protocol selected in Step 3 |
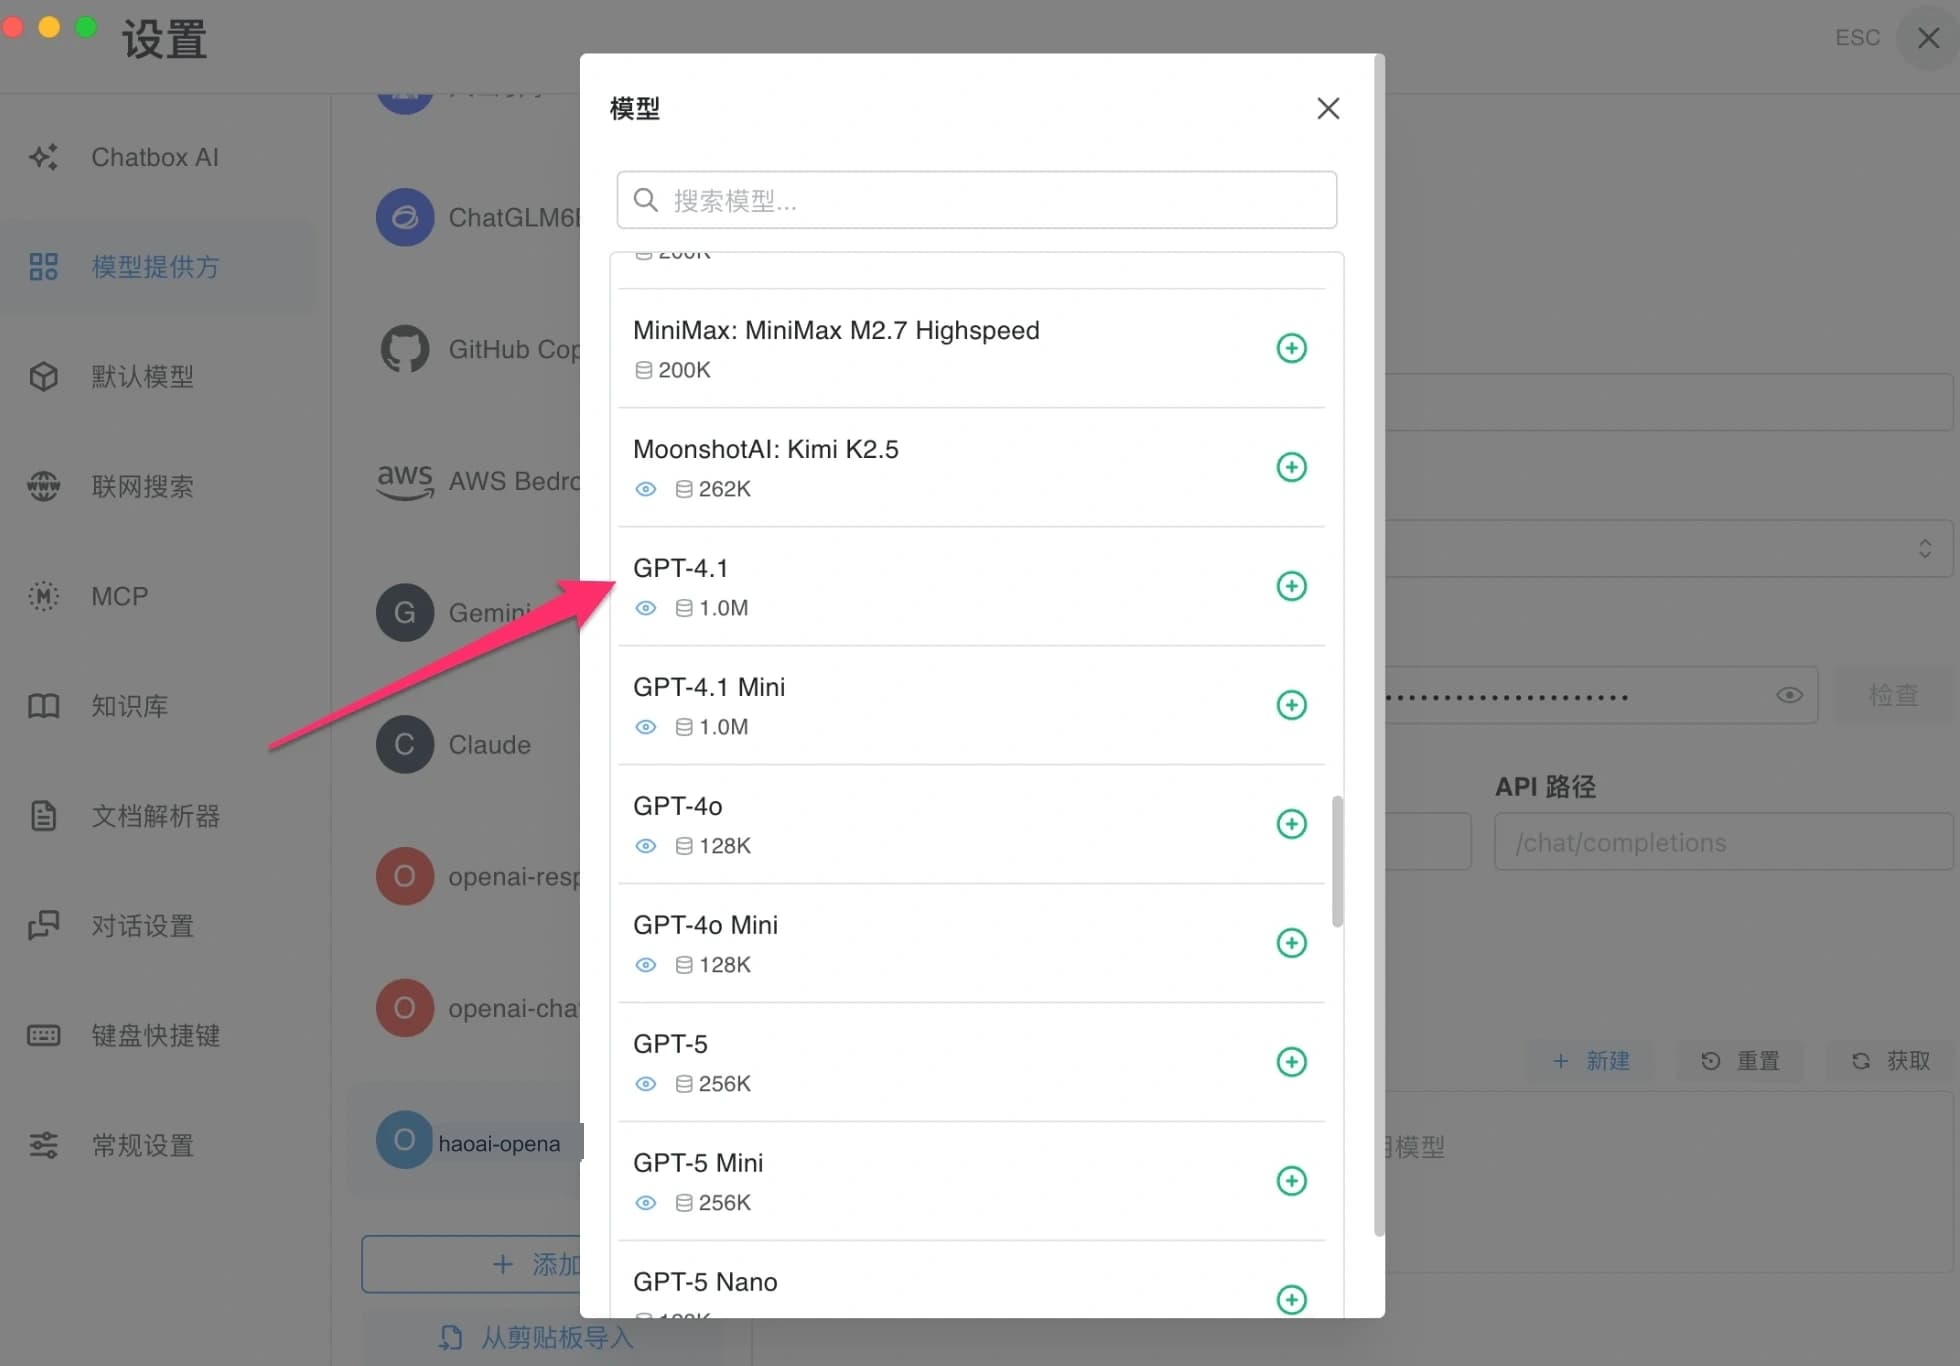
Step 5: Select Models
From the fetched model list, click + to add the models you need to the enabled list.
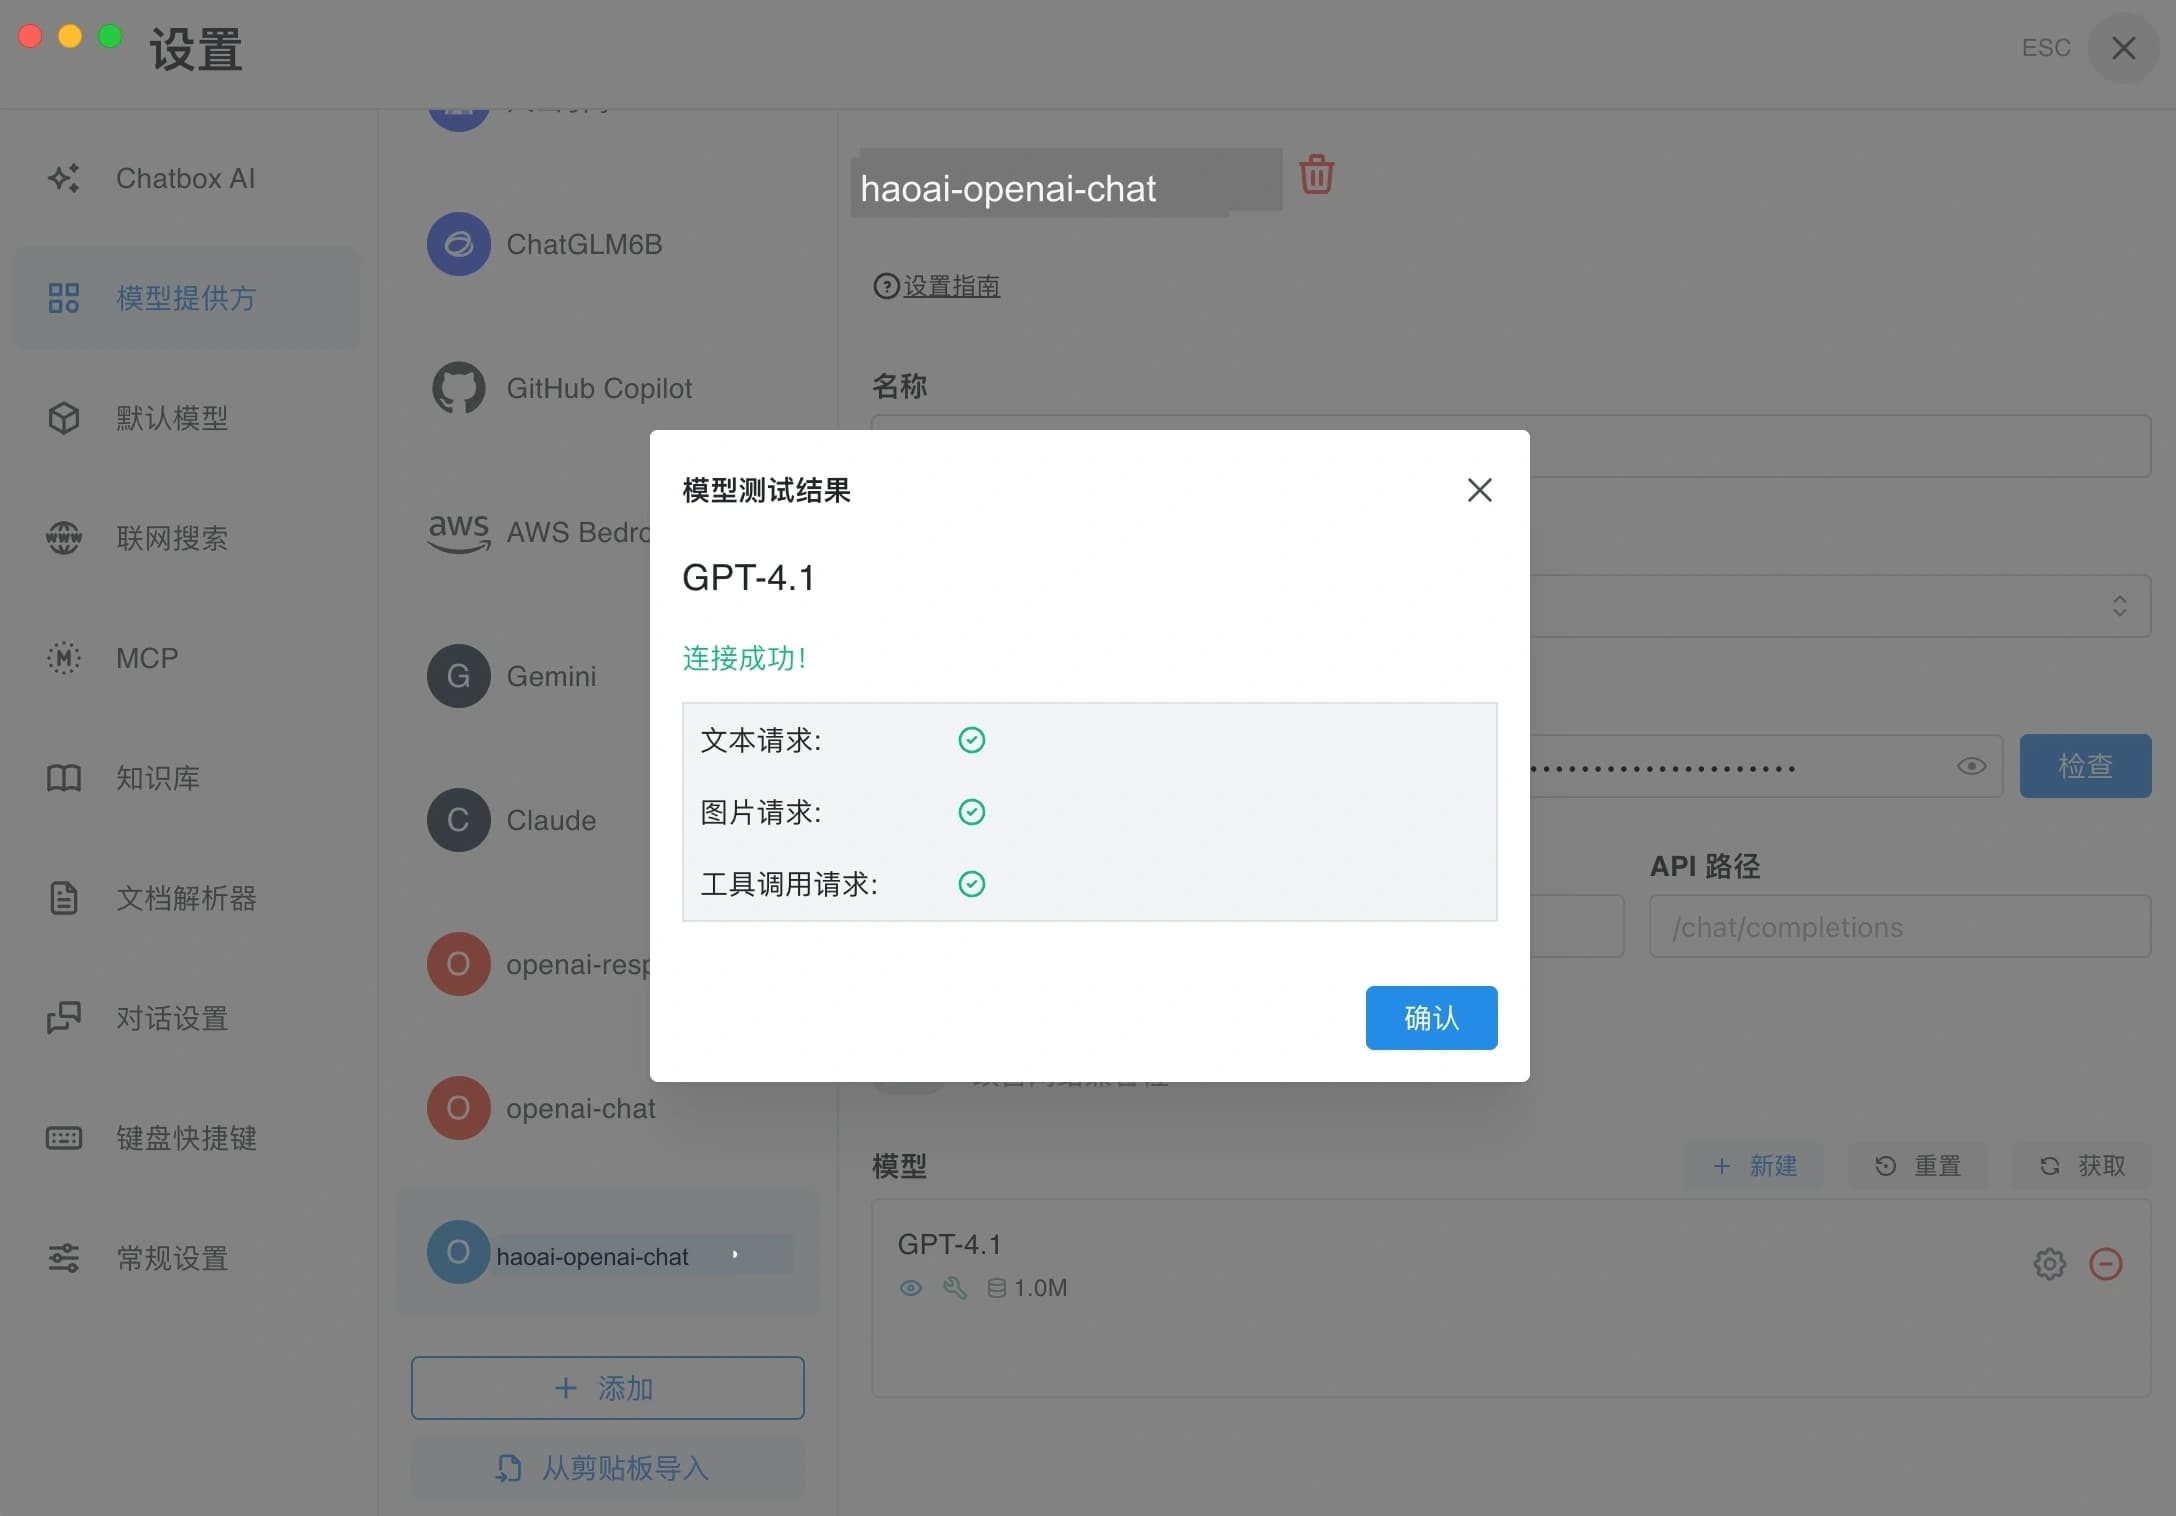
Step 6: Test the Connection
Click the Check button, then select a model in the dialog to test.

When “Connection successful!” appears with green checkmarks for text requests, image requests, and tool call requests, the configuration is complete.
Mobile Configuration (iOS/Android)
Chatbox supports iOS and Android. The mobile setup process is essentially the same as on desktop. Here is a mobile configuration example.
Step 1: Open Settings and Fill in Details
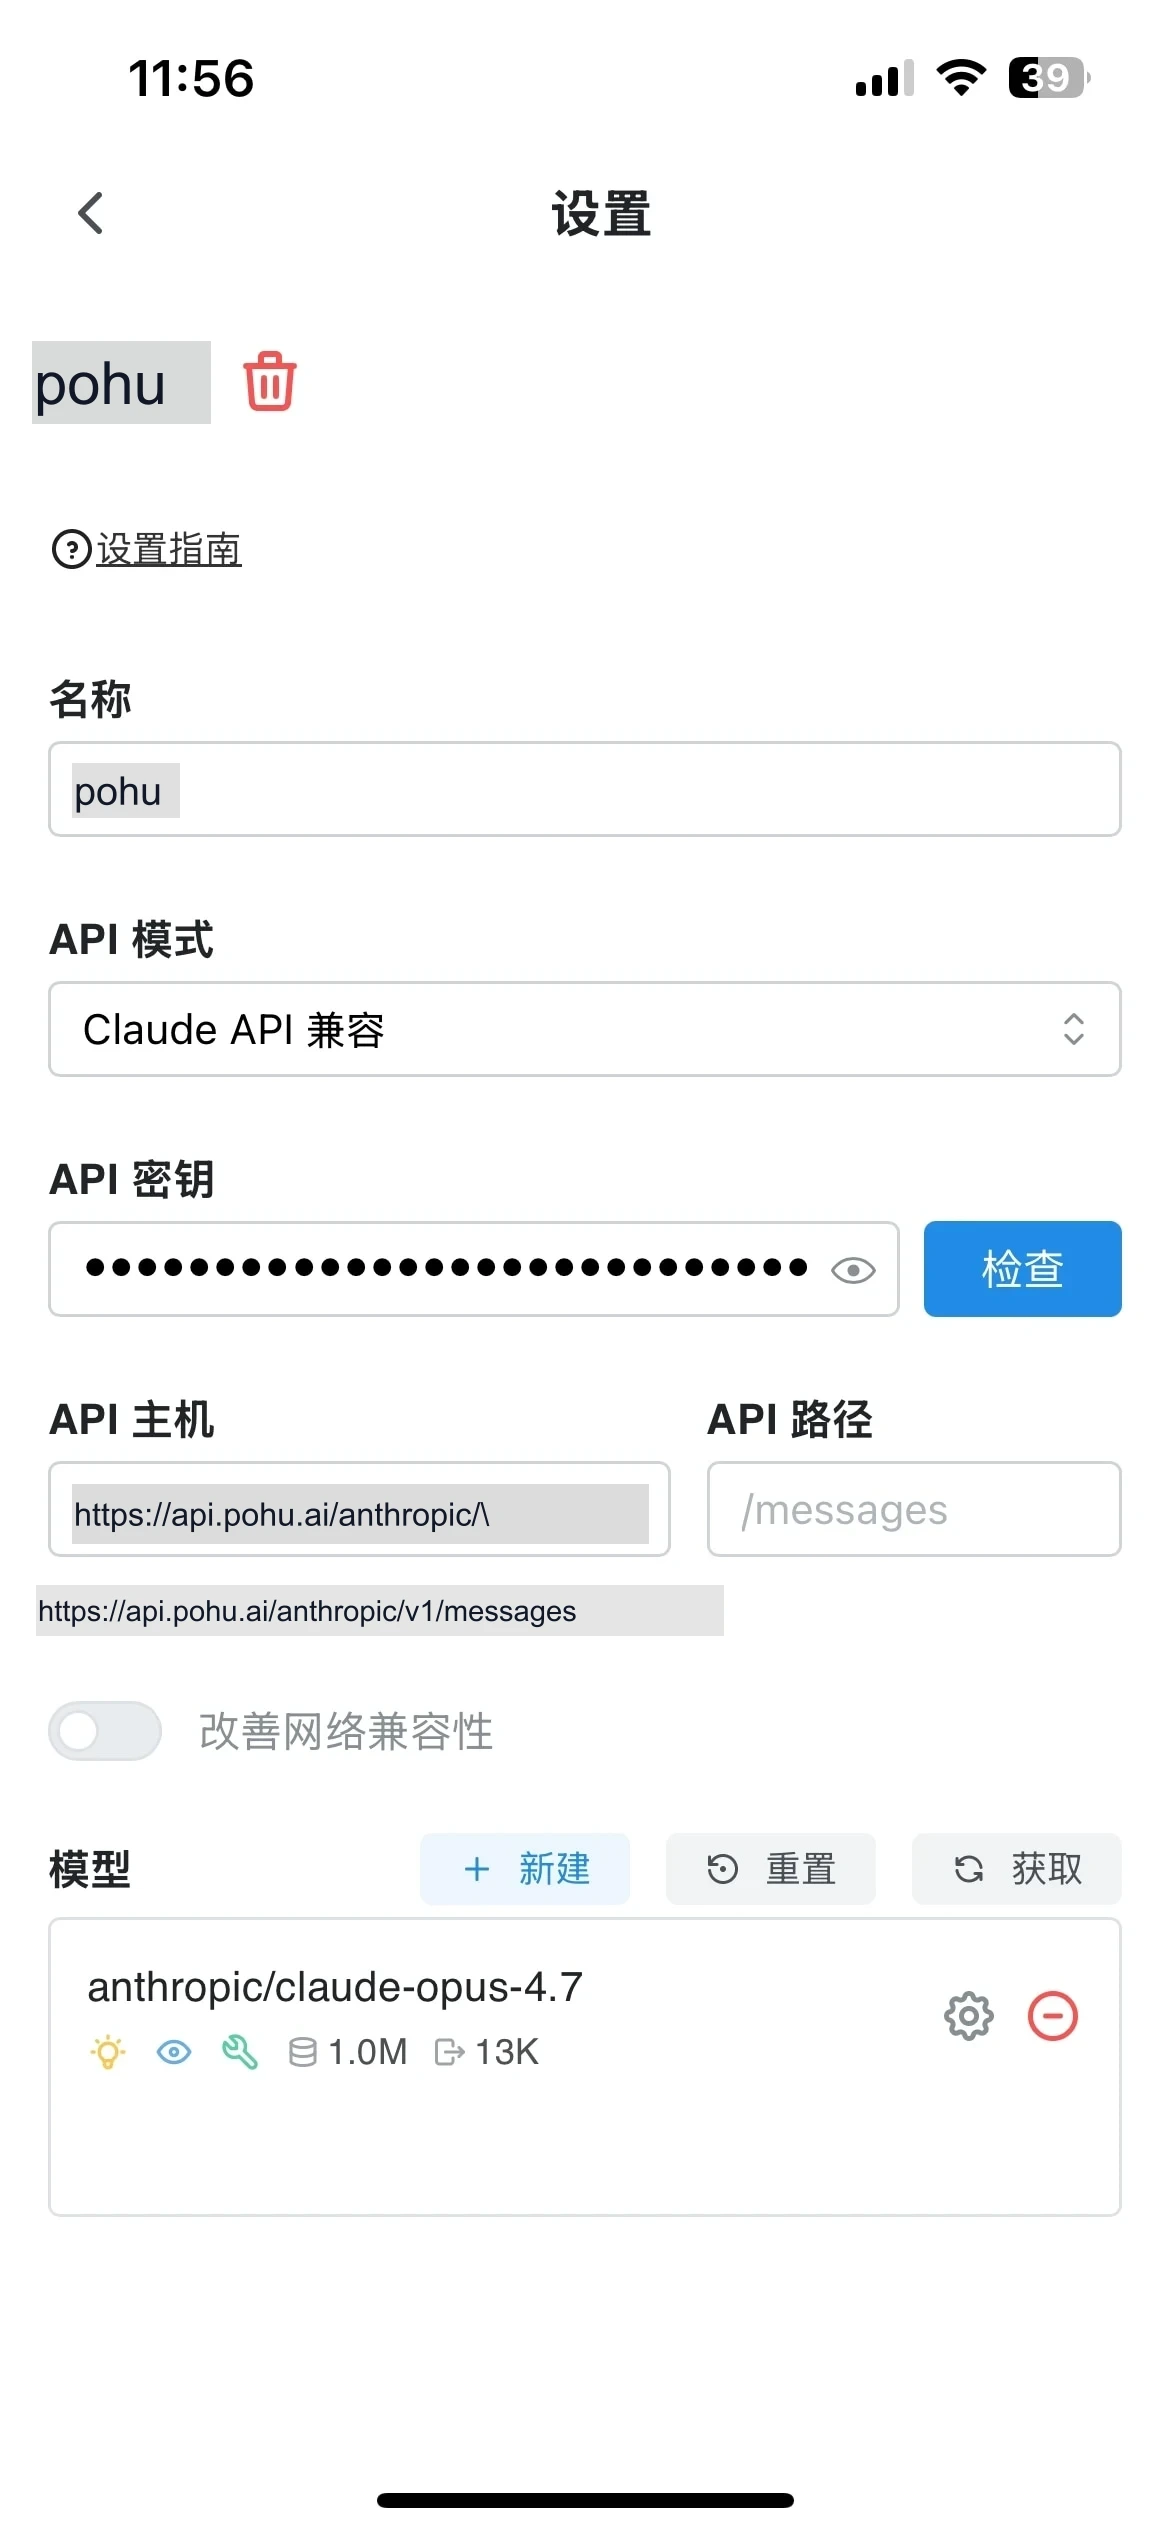
Launch Chatbox, go to Settings, tap + Add Model Provider, and fill in the configuration:
- Name: A custom name (e.g. “haoai”)
- API Mode: Select the one you need (e.g. Claude API Compatible)
- API Key: Paste your HaoAI API Key
- API Host: Enter the corresponding API address (e.g. for Claude:
https://api.hao.ai/anthropic/v1)
Step 2: Configure Model Parameters
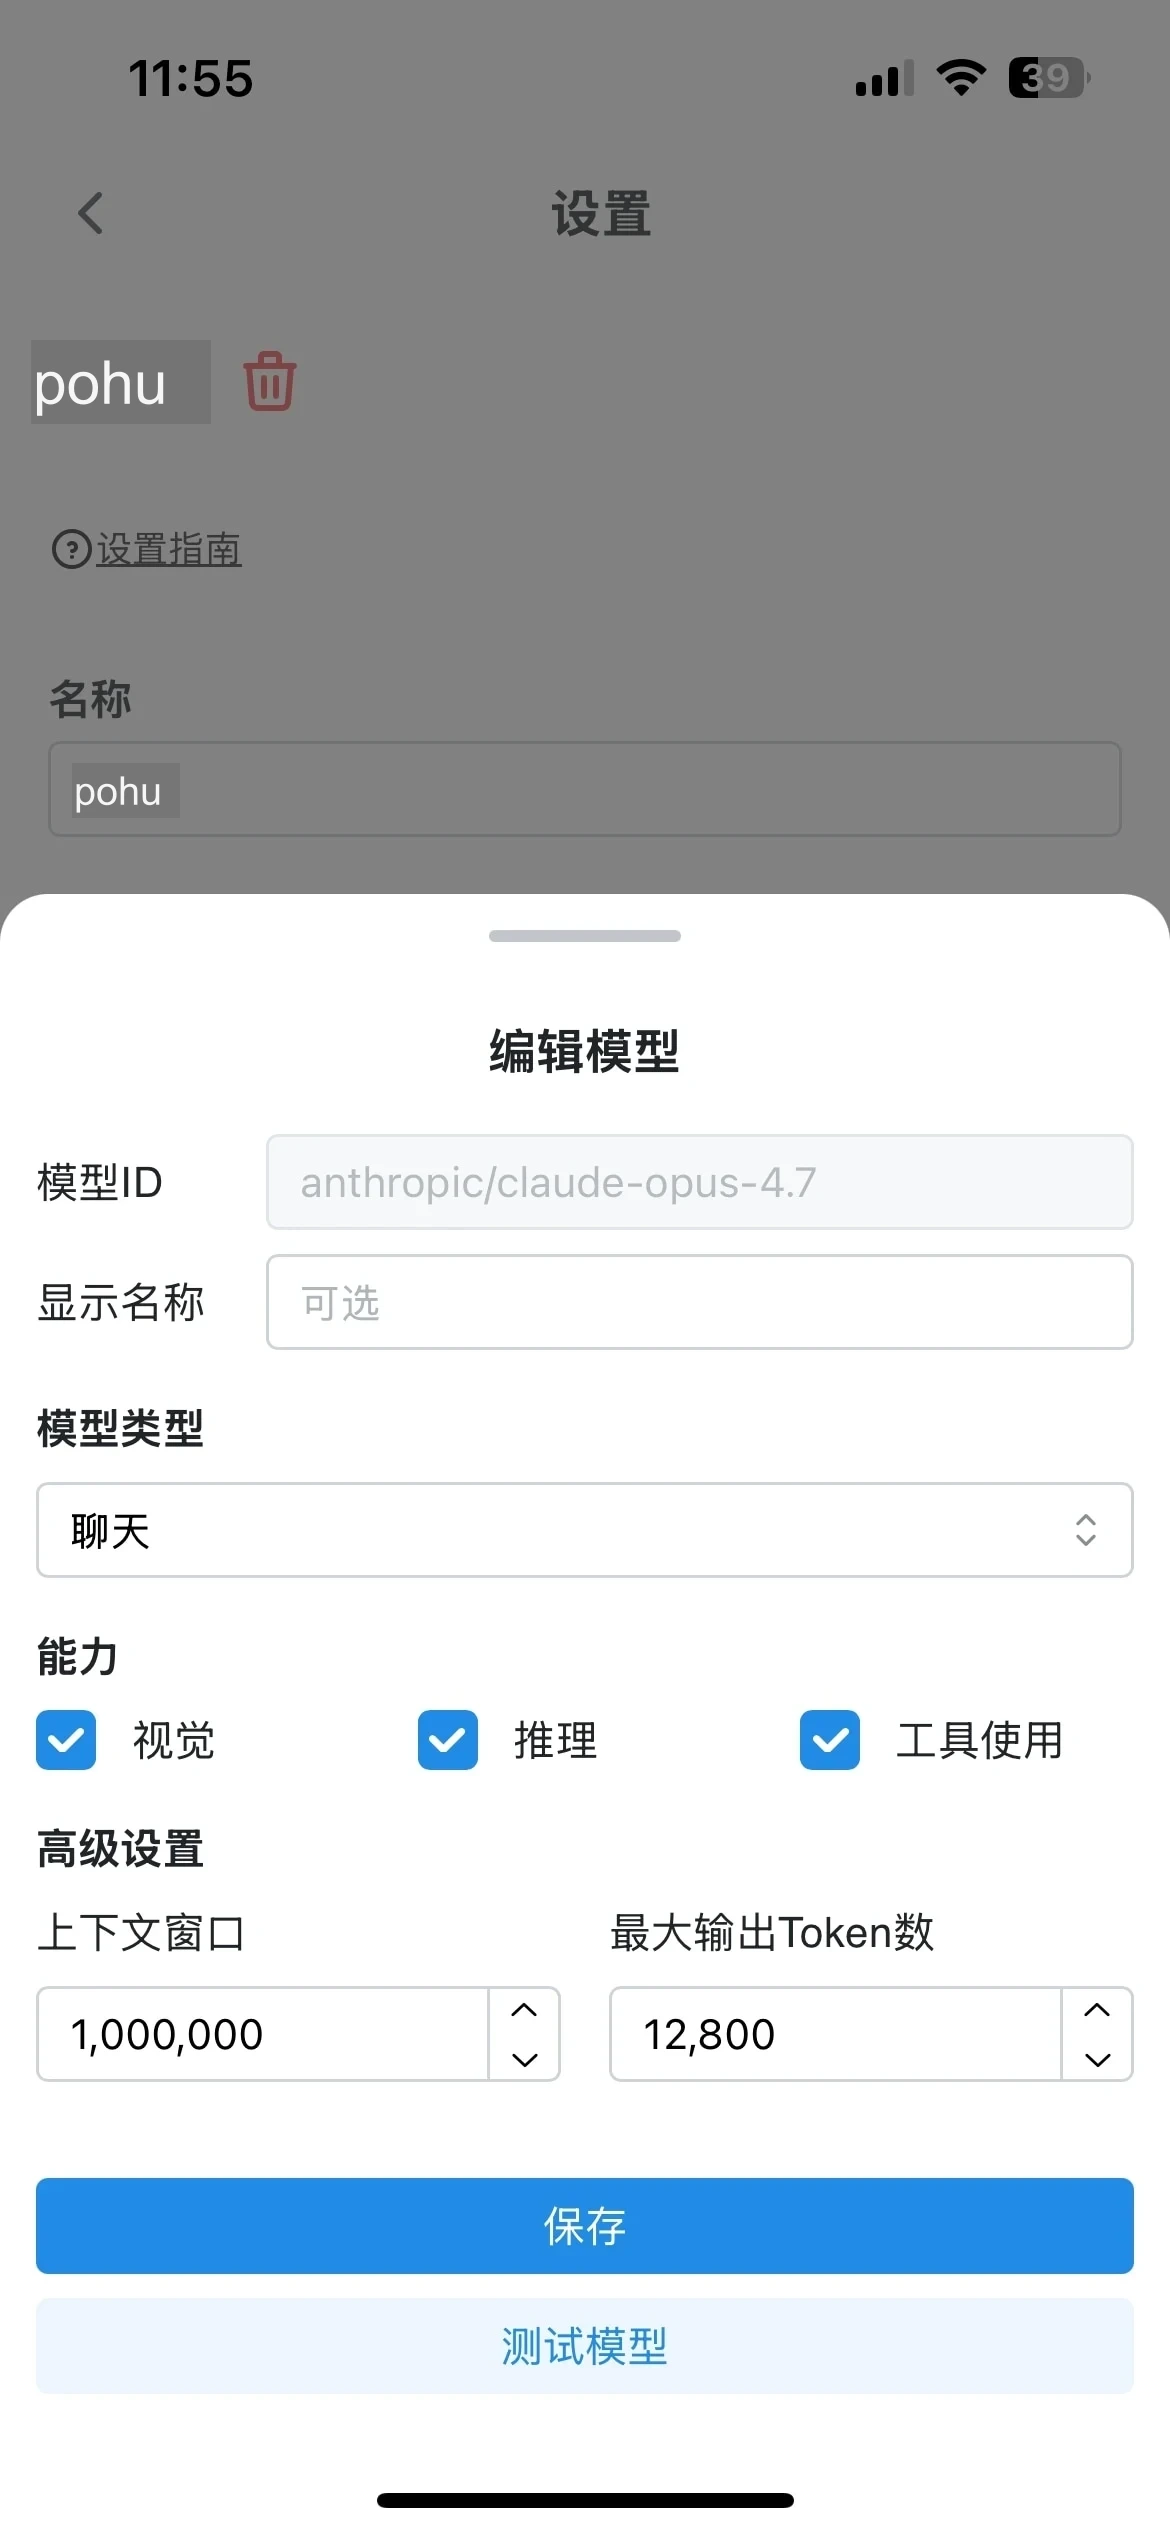
After tapping Save, go to the model configuration page and fill in:
- Model ID: e.g.
anthropic/claude-opus-4.7 - Model Type: Select Chat
- Capabilities: Check as needed (vision, reasoning, tool use, etc.)
Step 3: Test the Connection
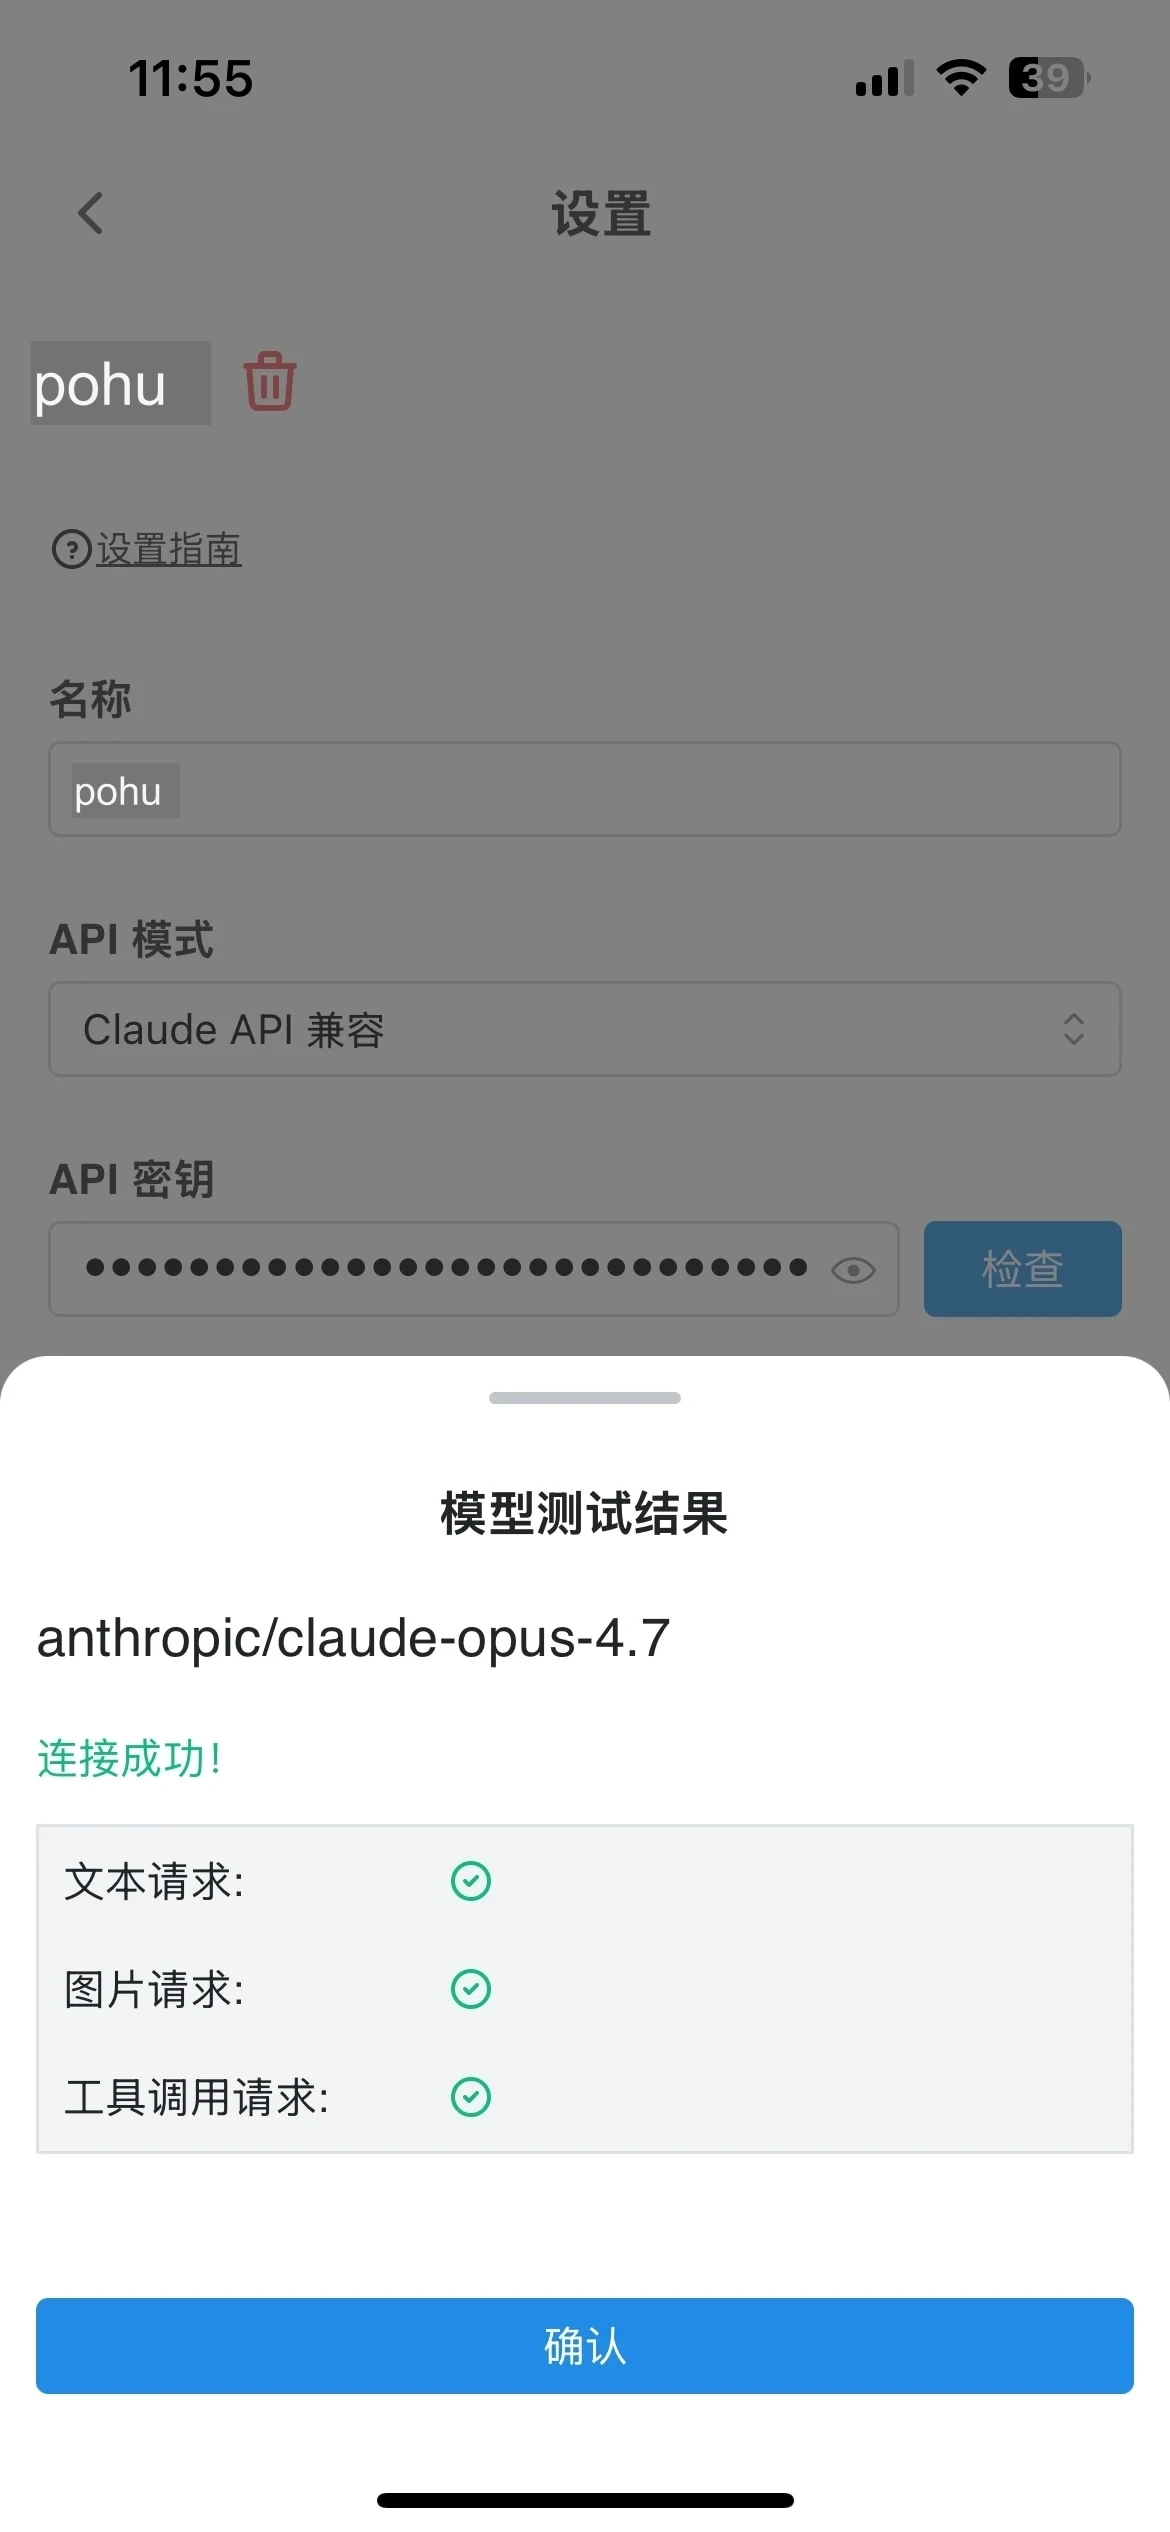
Tap Save, then tap Test Model to run a connection test. A successful test shows “Connection successful!” with green checkmarks for each capability.
Getting Started
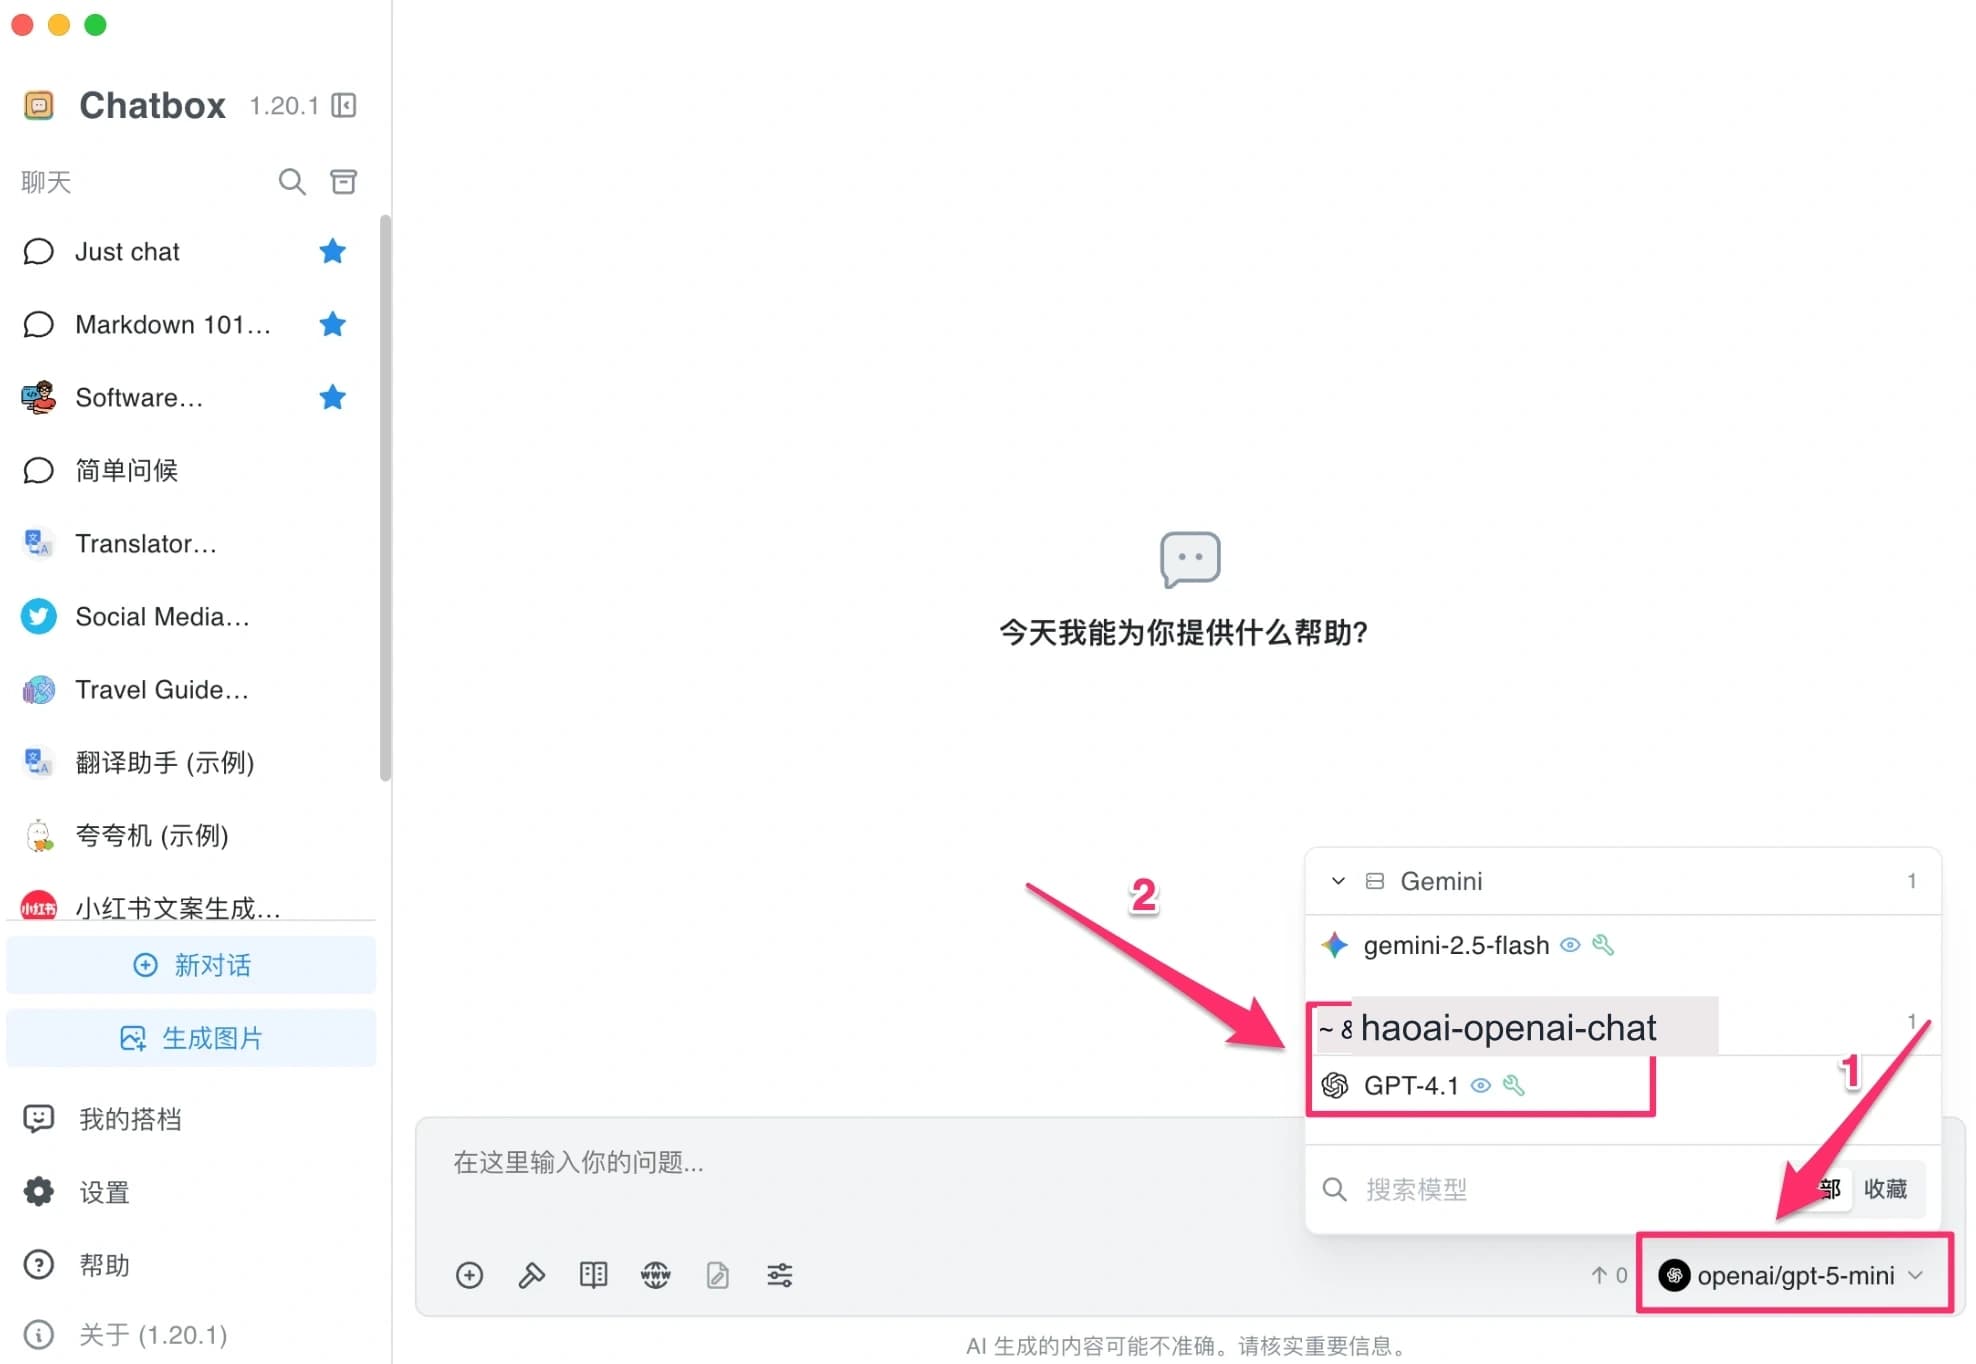
Close the settings and return to the main interface. Click Select Model in the bottom-right corner, choose a model under the corresponding provider group, and start chatting.
FAQ
Q: The model list is empty after clicking “Fetch”
Check that the API Host is entered correctly (no trailing slash) and that the API Key was copied in full.
Q: Connection failed during the check
- Confirm the API Key was copied in full from the HaoAI Console with no extra spaces
- Confirm the API Host is entered correctly
- Confirm your network connection is working